We use cookies to make your experience better. To comply with the new e-Privacy directive, we need to ask for your consent to set the cookies. Learn more.


How to Plumb a Sump (Complete Guide for Reef & Aquarium Systems)

A properly designed sump system is the backbone of a healthy aquarium. Whether you’re building a reef tank or upgrading your filtration system, understanding sump plumbing is essential for performance, stability, and long-term success.
In this guide, you’ll learn:
- What sump plumbing is
- Why it’s important
- How to plumb a sump step-by-step
- Basic vs Intermediate vs Advanced setups
- Recommended sump options
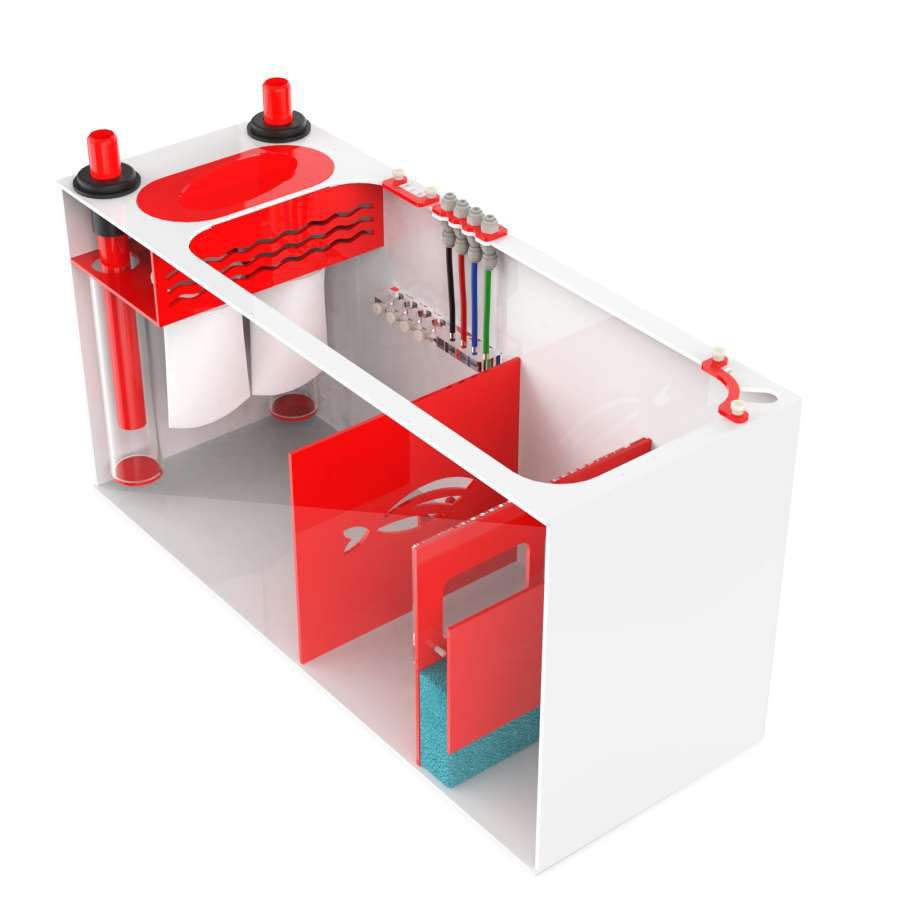
What Is Sump Plumbing?
A sump is a secondary tank connected to your main aquarium that houses filtration equipment like protein skimmers, heaters, and media.
Sump plumbing refers to the system of pipes, drains, and return lines that move water between the display tank and the sump.
How It Works:
- Water overflows from the display tank
- Travels through drain pipes into the sump
- Gets filtered through different chambers
- Return pump sends clean water back to the tank
This creates a continuous loop essential for aquarium health.
Why Sump Plumbing Is Important
Proper sump plumbing directly impacts:
✔ Water Stability
A sump increases total water volume, making your tank more stable and less prone to fluctuations.
✔ Cleaner Display Tank
All equipment stays hidden in the sump, improving aesthetics.
✔ Better Filtration
Allows multiple filtration stages (mechanical, biological, chemical).
✔ Improved Oxygenation
Water movement between sump and tank improves gas exchange.
How to Plumb a Sump (Step-by-Step)
1️⃣ Plan Your Layout
Before starting:
- Sketch your plumbing system
- Identify drain and return lines
- Choose pipe type (PVC or flexible tubing)
???? Planning reduces mistakes and leaks.
2️⃣ Install Overflow System
- Internal overflow (drilled tank) or external overflow box
- Ensures safe water drainage to sump
3️⃣ Set Up Drain Line
- Water flows from tank → sump
- Use PVC or flexible tubing
- Add:
- Ball valve (flow control)
- Union fittings (easy maintenance)
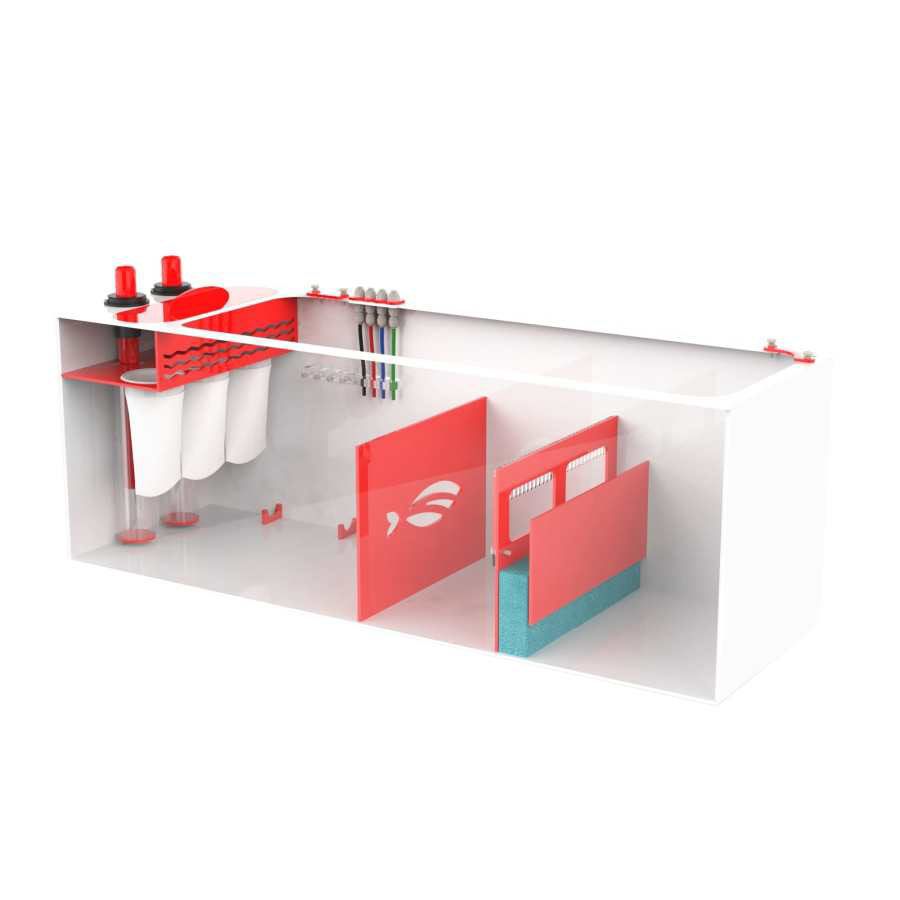
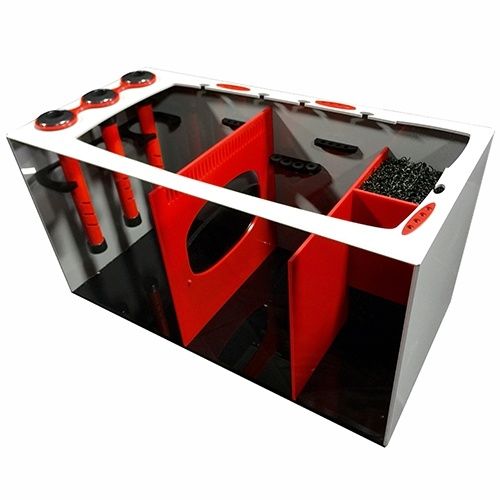
4️⃣ Configure Sump Chambers
Typical sump layout:
- Chamber 1: Filter socks (mechanical filtration)
- Chamber 2: Protein skimmer + heater
- Chamber 3: Refugium or media
- Chamber 4: Return pump
Water flows through each stage for filtration.
5️⃣ Install Return Pump
- Pumps water back to display tank
- Connect using flexible tubing to reduce vibration
6️⃣ Add Return Line
- Includes:
- Check valve (prevents backflow)
- Return nozzle in tank
7️⃣ Test the System
- Run system without livestock
- Check for:
- Leaks
- Overflow issues
- Noise
Basic vs Intermediate vs Advanced Sump Plumbing
Basic Sump Setup (Beginner)
Best for: Small tanks, new hobbyists
Features:
- Single drain + return line
- 3 chambers
- Filter sock + skimmer
Simple and cost-effective
Basic systems use minimal plumbing and essential filtration only.
Intermediate Sump Setup
Best for: Growing reef systems
Features:
- Additional reactors (carbon, GFO)
- Refugium section
- Improved flow control
???? More stability and nutrient control
Adds biological media and automation for better performance.
Advanced Sump Setup
Best for: Serious reef keepers
Features:
- Multiple return pumps
- Manifolds for reactors
- Automated dosing systems
- Redundant plumbing
Maximum control and customization
Advanced systems allow full control over water chemistry and flow.
Key Sump Plumbing Components
To build an efficient system, you’ll need:
✔ PVC pipes or flexible tubing
✔ Bulkheads (tank connections)
✔ Ball valves (flow control)
✔ Union fittings (maintenance)
✔ Check valves (backflow prevention)
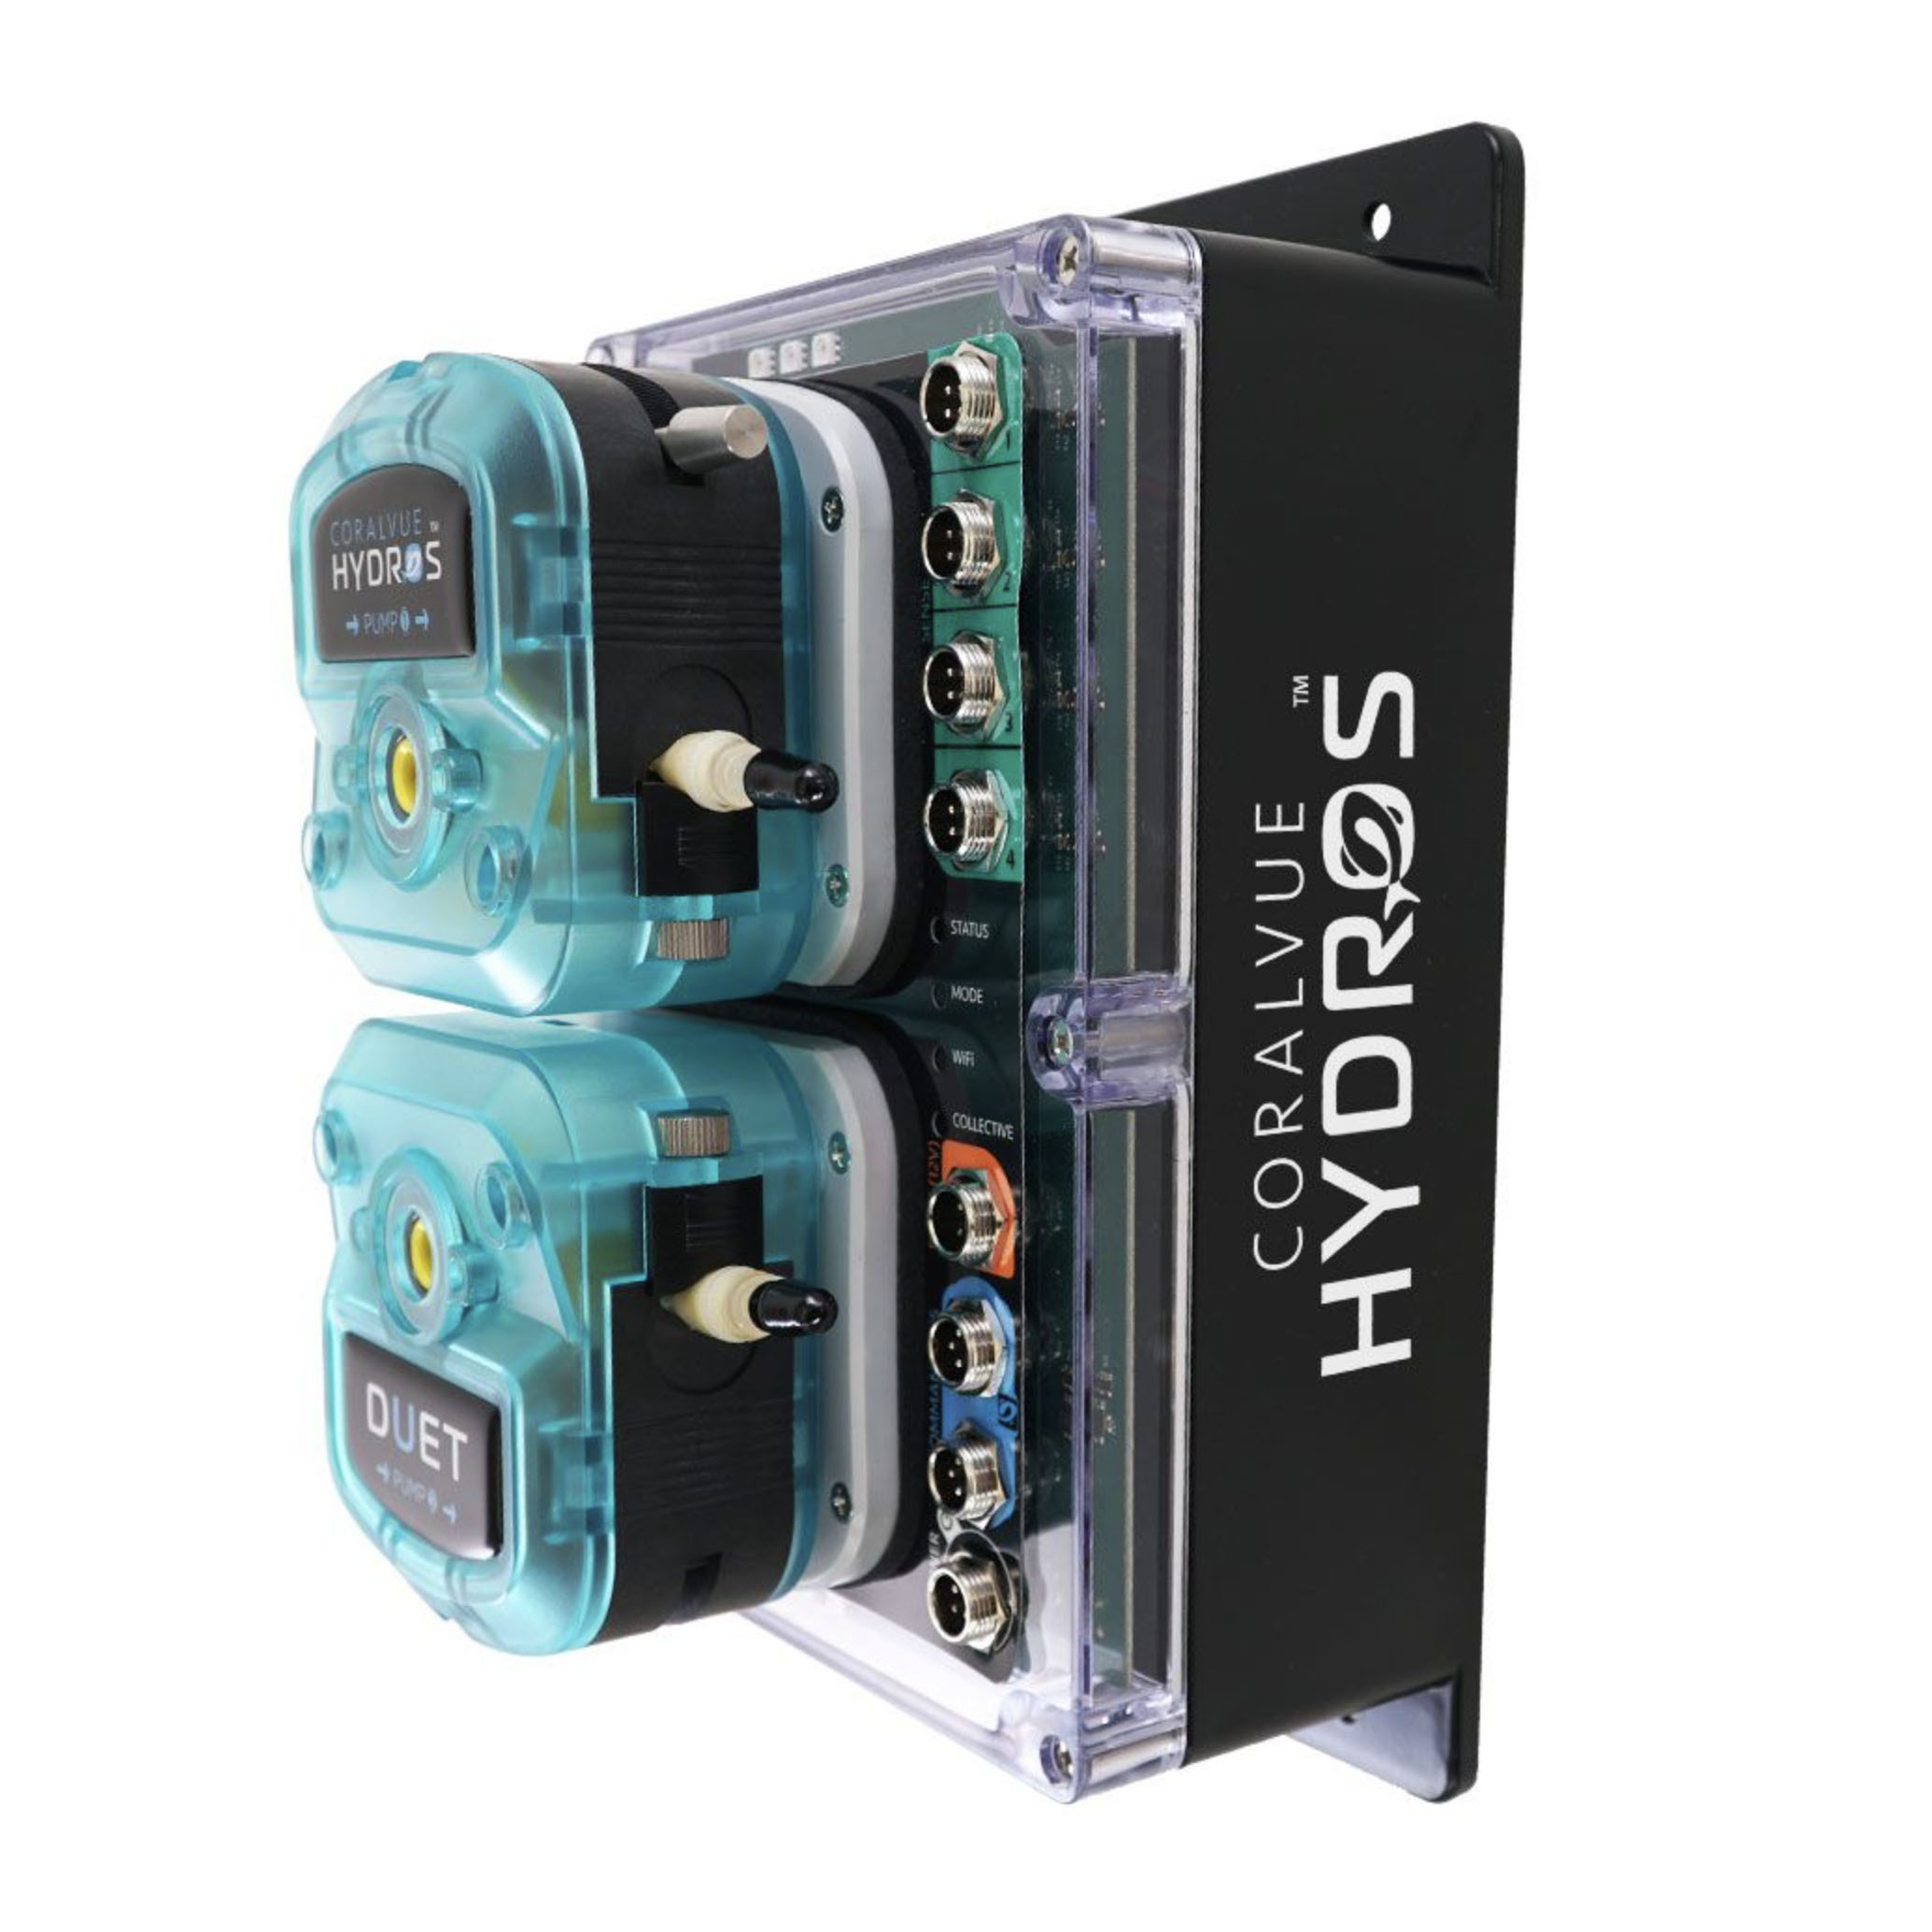
✔ Return pump
✔ Overflow box
Common Sump Plumbing Mistakes
Avoid these:
❌ Too many sharp 90° bends (reduces flow)
❌ No unions (hard to maintain)
❌ Incorrect pump sizing
❌ No emergency drain
❌ Poor planning
???? Even experienced hobbyists make these mistakes — planning is key.
Benefits of a Properly Plumbed Sump
✔ Better water quality
✔ Increased system stability
✔ More equipment flexibility
✔ Reduced maintenance
✔ Cleaner display tank
✔ Higher oxygen levels
Recommended Sump Brands from Aquarium Specialty
Sump Brands We Offer:
- Bashsea Sumps
- Acrylic Habitats Sumps

- MRC Sumps
- IceCap Sumps
- ProClear Sumps
- Reef Octopus Sumps
- Tideline Sumps
- Other Sumps (when included with the aquarium)
Based on your catalog, here are strong options to highlight:
Entry-Level (Basic Setup)
- Standard acrylic sump systems
- Compact sumps for small tanks
Best for beginners
Mid-Level (Intermediate)
- Multi-chamber sumps with refugium
- Sumps with built-in filter sock holders
Balanced performance + flexibility
Advanced Systems
- Large reef-ready sumps
- Systems with dosing + automation compatibility
Ideal for SPS and high-end reef tanks
Explore full collection: Aquarium Specialty Sumps Collection
Final Thoughts
Sump plumbing might seem complex, but once you understand the flow and components, it becomes one of the most powerful upgrades for your aquarium.
Whether you’re setting up a basic sump or an advanced reef system, proper plumbing ensures:
- Better filtration
- Healthier livestock
- Long-term stability
Invest time in planning, use quality components, and your aquarium will reward you with crystal-clear water and thriving life.
March 25, 2026
|
View: 425
|
Categories: Filtration, home, Beginners
|
By: <a class="mp-info" href="https://www.aquariumspecialty.com/blog/author/scott">Scott Groseclose</a>
|
Modify By: <a class="mp-info" href="https://www.aquariumspecialty.com/blog/author/aquariumspecialty">AquariumSpecialty</a> at March 25, 2026
About the Author

New BioTek Marine Frag Racks
May 6, 2014
Life in Bubbles: The Real Age of Clownfish
October 5, 2023
The Tiger Pistol Shrimp (Alpheus bellulus) For Your Aquarium
February 18, 2024
Clownfish and Temperature: Finding the Sweet Spot
October 5, 2023